• Jewelry-Making Supplies
  • Kits & Collections
  • Subscriptions
  • Learn to Make
  • Discounts & Deals

Learn Basic Pearl Knotting

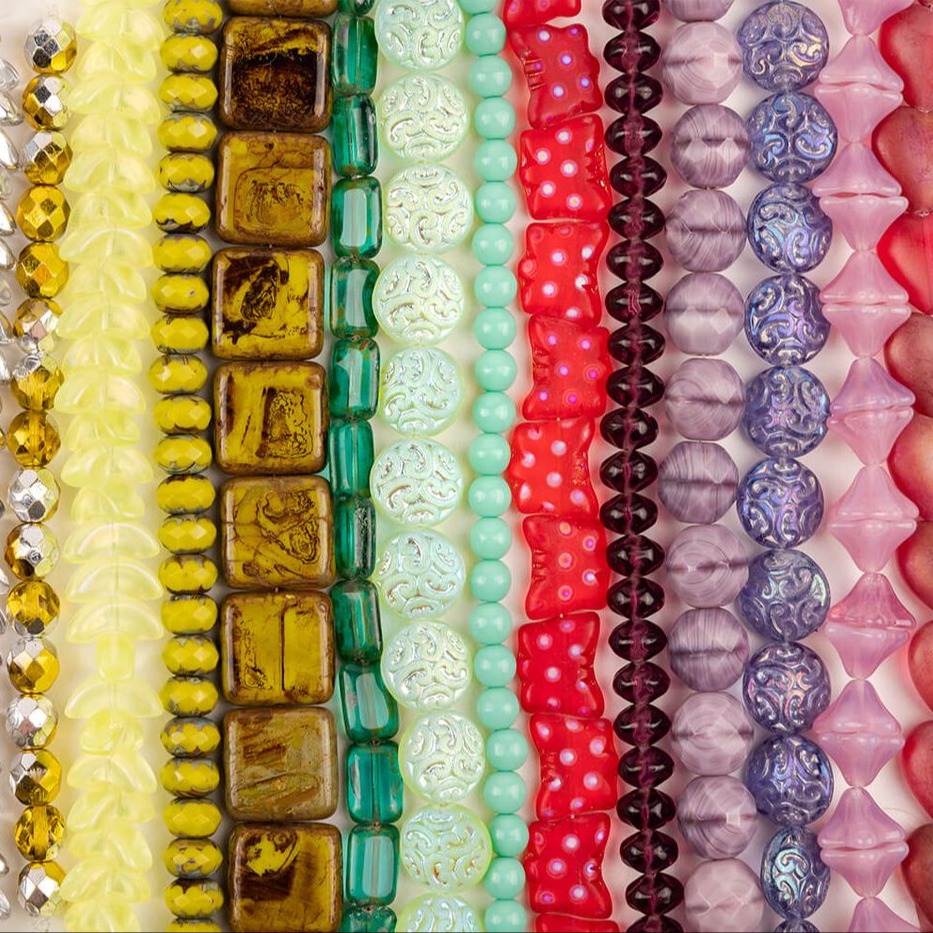
Take your jewelry-making skills up a notch with pearl knotting, a timeless technique that blends sophistication and craftsmanship. Perfect for creating necklaces and bracelets, this method involves tying evenly spaced knots between beads using silk knotting cord. The knots add a professional finish while showcasing the beauty of your beads, whether they’re delicate pearls, gemstones, or vibrant Czech glass. Add a tassel for a trendy touch or a clasp to complete your design.

While slightly more involved than bead stringing, pearl knotting offers a rewarding way to personalize your jewelry. On this page, you’ll find step-by-step instructions to guide you through the process, whether you're aiming for a classic pearl necklace or a colorful beaded bracelet. Plus, explore our additional project links for even more knotting inspiration and patterns. Ready to knot? Let’s get started!

Single Strand Pearl Bracelet

Supplies for a Simple Knotted Necklace

The first step in starting a new jewelry project is to gather your supplies! For a basic knotted necklace you will need single-hole beads, silk knotting cord, a beading awl, and a pendant!

Instructions for Basic Knotting

Step 1: Color the beads and silk cording color.

Choose from a variety of single-hole beads such as pearls, gemstones, and czech glass beads. Next you'll choose your silk cord that compliments your beads and this comes in a variety of lovely colors.

Step 2: Start the Project!

You can begin the project by adding a wire guard, adding knot covers, but for simplicity we will dive right into adding beads and knotting. The first step is to tie a double knot 1" from the end of the cord and apply a small drop of glue to the knot.

Picture of Knot Cover on Silk Thread
Step 3: String A Bead

Add a bead right next to the starting knot. Tie and overhand knot and use a beading awl to tighten the knot down close to the bead.

Picture of Pearl on Silk Thread
Step 4: String Next Bead(s) in Pattern

Once the knot is in place, add the next bead in the pattern to pull the knot tight.  Continue with these steps until you have reached the desired length of your necklace.

Picture of Pearls on Silk Thread

Follow Along with a Video Tutorial

Do you prefer to learn by watching?  Follow along with Allie has she provides detailed instructions on the basics of pearl knotting.  She will highlight the necessary tools and supplies you will need as well as step by step instructions for the project. 

Become a Better Beader!

The Better Beader episodes from Potomac Bead Company are your go-to resource for mastering beading stitches and choosing the right materials for your projects. Explore essential beading stitch patterns like peyote, herringbone, and brick stitch, while learning how to select the best threads for strength and flexibility.

These episodes also offer expert tips on threading needles, determining how much thread to use, and replacing worn tools. Whether you’re a beginner or an experienced beader, Better Beader provides practical techniques and creative solutions to help you perfect your craft. Start your journey today!

Search our full line of products

Jewelry Making Tips and Tricks

Practice Basic Techniques

Start with simple projects to practice basic techniques before moving on to more complex designs.

Experiment with Color and Texture

Jewelry is a great way to express your personal style, so don’t be afraid to experiment with different colors, textures, and materials. Check out this excellent blog entry to help guide you in choosing colors - 6 Color Theory Tips to Enhance Your Beading Designs!

Stay Organized

Keep your workspace organized by using a bead mat or tray to keep your beads from rolling away and keeping your tools within reach.

Plan Your Design

Before you start creating your jewelry, sketch out your design and gather your materials. This will help you stay organized and ensure you have all the materials you need.

Take Breaks

Jewelry making can be time-consuming and requires a lot of focus. Take frequent breaks to avoid eye strain and hand fatigue.

Don't Be Afraid to Make Mistakes

Making mistakes is part of the learning process. If you make a mistake, don’t be discouraged, take it as an opportunity to learn and improve your skills.

Share Your Creations

Share your creations with others by wearing your jewelry, giving it as gifts, or selling it online. It’s a great way to get feedback and improve your skills.

Blue Bayou SuperDuo

Potomac Bead is host to a Beading and Jewelry making group of over 80 thousand members of all skill levels. Share projects and ideas, get advice and inspiration from fellow artisans, and see what others are making. Creating is better with friends!