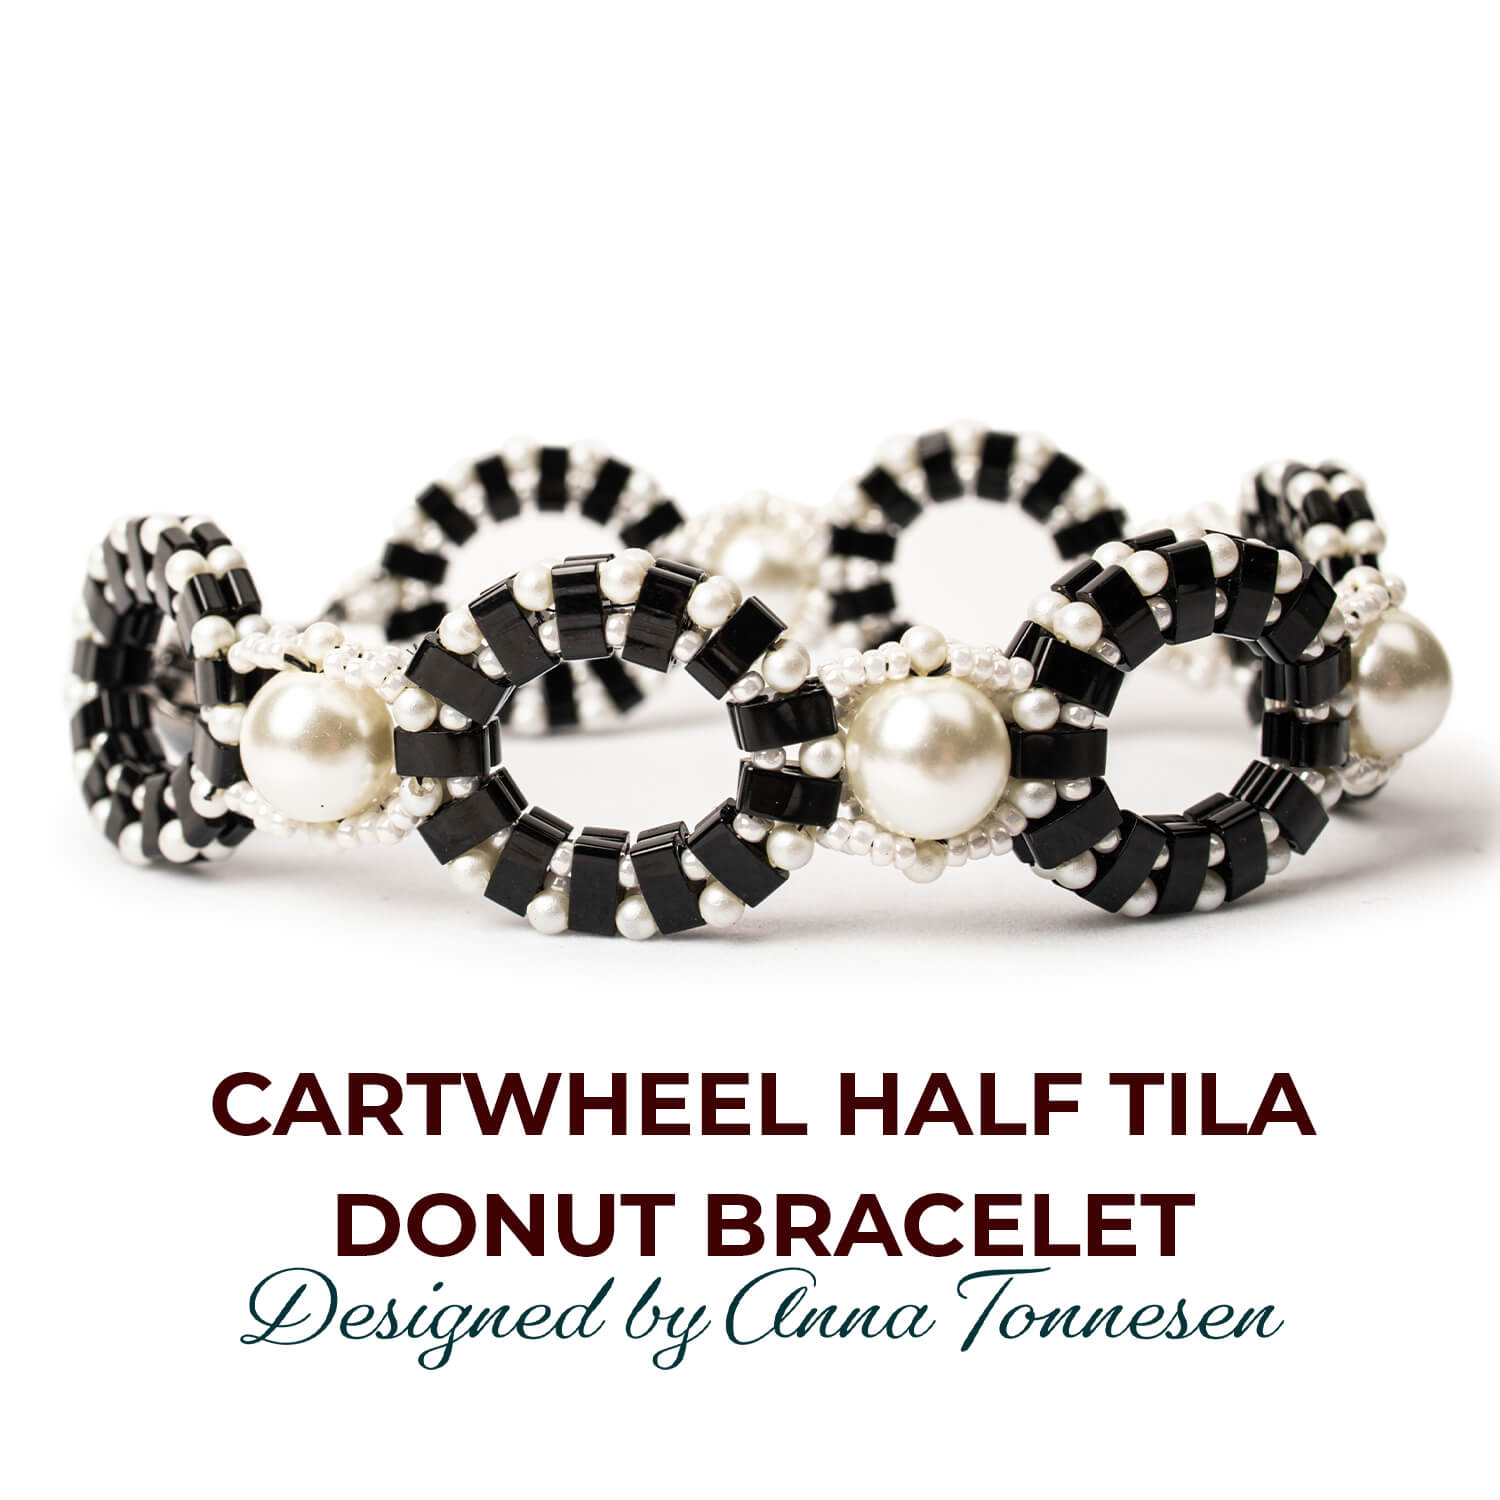
Pattern - Cartwheel Half Tila Donut Bracelet

Create your own stunning Cartwheel Half Tila Donut Bracelet with this step-by-step DIY jewelry-making tutorial by PotomacBeads. This tutorial covers all the materials and techniques you need, including Miyuki Half Tila beads, 15/0 seed beads, Potomac pearls, and Czech cabochons. The detailed instructions will guide you through creating a beautiful, handmade bracelet with a Claspgarten Infinite Box Push Clasp. Whether you're a beginner or experienced in beading, this artistic project is perfect for anyone who enjoys creating their own jewelry. Get started today and craft a piece you’ll love to wear or gift!

Step 1: Choose Your Materials

Step 2: Watch the 
Video Tutorial

Pattern - Cartwheel Half Tila Donut Bracelet

Step 3: Need More Help? Follow these Steps

steps

Quick Project Steps

Prepare Materials: Gather all the materials including Miyuki Half Tila beads, seed beads, pearls, and a clasp. Lay them out in an organized way. String the First Row: Start by threading the Miyuki Half Tila beads in a circular arrangement, ensuring they align properly. Add Seed Beads: Between each Tila bead, add 15/0 seed beads to connect them and form the base structure. Incorporate Pearls: Once the base is done, add the 2mm pearls around the outer edge to enhance the design and give it texture. Attach the Cabochon: Introduce the Czech cabochon to the center of the design, carefully securing it with additional seed beads. Connect the Clasp: Using the Claspgarten Infinite Box Push Clasp, attach it to both ends of the bracelet to complete the closure. Embellish: Add final pearls or beads for extra flair and ensure all beads are securely in place. Finishing Touches: Check the entire structure, tightening any loose threads or beads.

Step 4: Pick Your Own Colors

Step 5: Need Any Extra Materials?

Step 5: Need Any Extra Materials?

Potomacbeads Beading Ruler | Advanced | 6x3"
Beading Mat - Beading Design Mat
PotomacBeads Pliers - Round Nose Pliers

Step 6: Choose Your Next Project

Step 6: Choose Your Next Project

  • Glasgow Rose Embroidered Pendant - DIY Jewelry Making Tutorial by PotomacBeads
  • Glasgow Rose Embroidered Pendant - DIY Jewelry Making Tutorial by PotomacBeads

Watch Anna Tonnesen as she provides detailed step by step tutorial instructions to learn to embroider with beads. Create the Glasgow Rose pendant or create your own masterpiece of DIY jewelry following this project tutorial. Learn how to lay out your embroidery project, cut and shape your surface, sew on beads, apply the backing and seem the sides of the piece.
  • Comet Earrings - DIY Jewelry Making Tutorial by PotomacBeads
  • Flower Gem Earrings - DIY Jewelry Making Tutorial by PotomacBeads
  • Embroidered Rings - DIY Jewelry Making Tutorial by PotomacBeads

Join Our Growing Community

Community profile photo 1
Community profile photo 2
Community profile photo 3
Community profile photo 4

Our Testimonials

Only Visible on Admin Mode

Item Description

Create your own stunning Cartwheel Half Tila Donut Bracelet with this step-by-step DIY jewelry-making tutorial by PotomacBeads. This tutorial covers all the materials and techniques you need, including Miyuki Half Tila beads, 15/0 seed beads, Potomac pearls, and Czech cabochons. The detailed instructions will guide you through creating a beautiful, handmade bracelet with a Claspgarten Infinite Box Push Clasp. Whether you're a beginner or experienced in beading, this artistic project is perfect for anyone who enjoys creating their own jewelry. Get started today and craft a piece you’ll love to wear or gift!

Designer's Material List

Project Steps

Prepare Materials: Gather all the materials including Miyuki Half Tila beads, seed beads, pearls, and a clasp. Lay them out in an organized way. String the First Row: Start by threading the Miyuki Half Tila beads in a circular arrangement, ensuring they align properly. Add Seed Beads: Between each Tila bead, add 15/0 seed beads to connect them and form the base structure. Incorporate Pearls: Once the base is done, add the 2mm pearls around the outer edge to enhance the design and give it texture. Attach the Cabochon: Introduce the Czech cabochon to the center of the design, carefully securing it with additional seed beads. Connect the Clasp: Using the Claspgarten Infinite Box Push Clasp, attach it to both ends of the bracelet to complete the closure. Embellish: Add final pearls or beads for extra flair and ensure all beads are securely in place. Finishing Touches: Check the entire structure, tightening any loose threads or beads.