- Jewelry-Making Supplies ▾
Design Jewelry with Confidence!
Seed Beads
Thread, Wire, & Stringing Materials
Athenacast Findings & Components
Everything Else
- Kits & Collections ▾
Assemble Your World
Kits & Collections
- Subscriptions ▾
Want monthly Beading Happiness?
Subscriptions
- Learn to Make ▾
Want to learn more?
- Discounts & Deals ▾
Explore Today's Promotions!
- Jewelry-Making Supplies
- Kits & Collections
- Subscriptions
- Learn to Make
- Discounts & Deals
-
Seed Beads
Thread, Wire, & Stringing Materials
Findings & Components
Everything Else
-
Kits & Collections
-
Subscriptions
- Home
- How to Make Jewelry
- Projects & Tutorials
- Stringing & Knotting Projects
- Men’s Leather Wrap Bracelet …
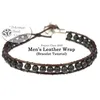
Men’s Leather Wrap Bracelet Tutorial

Step 2: Watch the
Video Tutorial
Step 2: Watch the
Video Tutorial
Step 3: Need More Help? Follow these Steps
Step 3: Need More Help? Follow these Steps

Quick Project Steps
Quick Project Steps
Attach the leather to the two-hole clasp, creating a loop at one end.
Using a size 10 needle and 0.008" Wildfire thread, begin sewing 4mm lava stones between the two leather cords, ensuring even spacing for flexibility and durability.
After adding all beads, secure the thread with knots and trim excess.
Apply E6000 glue to the ends of the leather cord and insert into the clasp. Allow to dry.
Optional: Place a lava stone or desired bead in the clasp's setting with E6000 glue for a finished look.
Step 4: Pick Your Own Colors
Step 4: Pick Your Own Colors
Step 5: Need Any Extra Materials?
Step 5: Need Any Extra Materials?
Step 5: Need Any Extra Materials?
Step 5: Need Any Extra Materials?
Step 6: Choose Your Next Project
Step 6: Choose Your Next Project
- Create a double or tripple leather wrap with an extra flair. Use seed beads to create a delicate border to showcase a mosaic of gemstones, crystals and glass. This wrap is comfortable to wear and makes a great piece to take (or make) on a summer vacation destination.Create a double or tripple leather wrap with an extra flair. Use seed beads to create a delicate border to showcase a mosaic of gemstones, crystals and glass. This wrap is comfortable to wear and makes a great piece to take (or make) on a summer vacation destination.
Step 6: Choose Your Next Project
Step 6: Choose Your Next Project
- Glasgow Rose Embroidered Pendant - DIY Jewelry Making Tutorial by PotomacBeads
- Glasgow Rose Embroidered Pendant - DIY Jewelry Making Tutorial by PotomacBeads
- Comet Earrings - DIY Jewelry Making Tutorial by PotomacBeads
- Flower Gem Earrings - DIY Jewelry Making Tutorial by PotomacBeads
- Embroidered Rings - DIY Jewelry Making Tutorial by PotomacBeads
Join Our Growing Community
Join Our Growing Community


Our Testimonials
Our Testimonials
- 55816 (83.7%)
- 4792 (11.4%)
- 3284 (4.1%)
- 229 (0.4%)
- 128 (0.4%)
- Favorite Reviews
- Highest to Lowest
- Newest to Oldest
- All Ratings
- 5 ★ Reviews
- 4 ★ Reviews
- 3 ★ Reviews
- 2 ★ Reviews
- 1 ★ Reviews
Loading...
Only Visible on Admin Mode
Item Description
Designer's Material List
Project Steps
Attach the leather to the two-hole clasp, creating a loop at one end.
Using a size 10 needle and 0.008" Wildfire thread, begin sewing 4mm lava stones between the two leather cords, ensuring even spacing for flexibility and durability.
After adding all beads, secure the thread with knots and trim excess.
Apply E6000 glue to the ends of the leather cord and insert into the clasp. Allow to dry.
Optional: Place a lava stone or desired bead in the clasp's setting with E6000 glue for a finished look.
Highest Quality
Products
100% Money
Back Guarantee
Fast
Shipping
Best Teaching &
Customer Service
You'll want these emails...
Get Free Projects & Inspiration
Get Free Projects & Inspiration
- Bullet 1
- Bullet 2
- Bullet 3
Copyright © PotomacBeads


