- Jewelry-Making Supplies ▾
Design Jewelry with Confidence!
Seed Beads
Thread, Wire, & Stringing Materials
Athenacast Findings & Components
Everything Else
- Kits & Collections ▾
Assemble Your World
Kits & Collections
- Subscriptions ▾
Want monthly Beading Happiness?
Subscriptions
- Learn to Make ▾
Want to learn more?
- Discounts & Deals ▾
Explore Today's Promotions!
- Jewelry-Making Supplies
- Kits & Collections
- Subscriptions
- Learn to Make
- Discounts & Deals
-
Seed Beads
Thread, Wire, & Stringing Materials
Findings & Components
Everything Else
-
Kits & Collections
-
Subscriptions
- Home
- How to Make Jewelry
- Projects & Tutorials
- Necklace Tutorials
- Button KNotted Necklace Tutorial
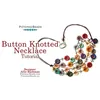
Button KNotted Necklace Tutorial

Step 1: Choose Your Materials
Step 1: Choose Your Materials
Step 2: Watch the
Video Tutorial
Step 2: Watch the
Video Tutorial
Potomac Table Cut Buttons - Mixed 10 Pack, ~ 36 Pieces
Waxed Linen Cording - Brown, ~ 13 Feet
Antique Silver Irregular Spacers, ~ 20 Pieces
Silver Plated Oval Clip Clasp, 1 Piece
Step 3: Need More Help? Follow these Steps
Step 3: Need More Help? Follow these Steps

Quick Project Steps
Quick Project Steps
Attach the Clasp: Securely tie the cording onto a silver-plated oval clip clasp using a loop method.
Begin Beading: Start by tying an overhand knot six inches from the clasp to designate the beginning of your beadwork.
Add Spacers and Buttons: Alternate between adding antique silver irregular spacers and Potomac table cut buttons, securing each with a knot.
Continue Beading: Work each strand one at a time, adding beads and buttons to your liking, ensuring a balanced design.
Final Knotting: Tie off the ends neatly and attach them to the other side of the clasp to complete your necklace.
Step 5: Need Any Extra Materials?
Step 5: Need Any Extra Materials?
Step 5: Need Any Extra Materials?
Step 5: Need Any Extra Materials?
Step 6: Choose Your Next Project
Step 6: Choose Your Next Project
- Create a double or tripple leather wrap with an extra flair. Use seed beads to create a delicate border to showcase a mosaic of gemstones, crystals and glass. This wrap is comfortable to wear and makes a great piece to take (or make) on a summer vacation destination.Create a double or tripple leather wrap with an extra flair. Use seed beads to create a delicate border to showcase a mosaic of gemstones, crystals and glass. This wrap is comfortable to wear and makes a great piece to take (or make) on a summer vacation destination.
Step 6: Choose Your Next Project
Step 6: Choose Your Next Project
- Glasgow Rose Embroidered Pendant - DIY Jewelry Making Tutorial by PotomacBeads
- Glasgow Rose Embroidered Pendant - DIY Jewelry Making Tutorial by PotomacBeads
- Comet Earrings - DIY Jewelry Making Tutorial by PotomacBeads
- Flower Gem Earrings - DIY Jewelry Making Tutorial by PotomacBeads
- Embroidered Rings - DIY Jewelry Making Tutorial by PotomacBeads
Join Our Growing Community
Join Our Growing Community


Our Testimonials
Our Testimonials
- 55868 (83.8%)
- 4799 (11.4%)
- 3287 (4.1%)
- 228 (0.4%)
- 124 (0.3%)
- Favorite Reviews
- Highest to Lowest
- Newest to Oldest
- All Ratings
- 5 ★ Reviews
- 4 ★ Reviews
- 3 ★ Reviews
- 2 ★ Reviews
- 1 ★ Reviews
Loading...
Only Visible on Admin Mode
Item Description
Designer's Material List
Potomac Table Cut Buttons - Mixed 10 Pack, ~ 36 Pieces
Waxed Linen Cording - Brown, ~ 13 Feet
Antique Silver Irregular Spacers, ~ 20 Pieces
Silver Plated Oval Clip Clasp, 1 Piece
Project Steps
Attach the Clasp: Securely tie the cording onto a silver-plated oval clip clasp using a loop method.
Begin Beading: Start by tying an overhand knot six inches from the clasp to designate the beginning of your beadwork.
Add Spacers and Buttons: Alternate between adding antique silver irregular spacers and Potomac table cut buttons, securing each with a knot.
Continue Beading: Work each strand one at a time, adding beads and buttons to your liking, ensuring a balanced design.
Final Knotting: Tie off the ends neatly and attach them to the other side of the clasp to complete your necklace.
Highest Quality
Products
100% Money
Back Guarantee
Fast
Shipping
Best Teaching &
Customer Service
You'll want these emails...
Get Free Projects & Inspiration
Get Free Projects & Inspiration
- Bullet 1
- Bullet 2
- Bullet 3
Copyright © PotomacBeads


