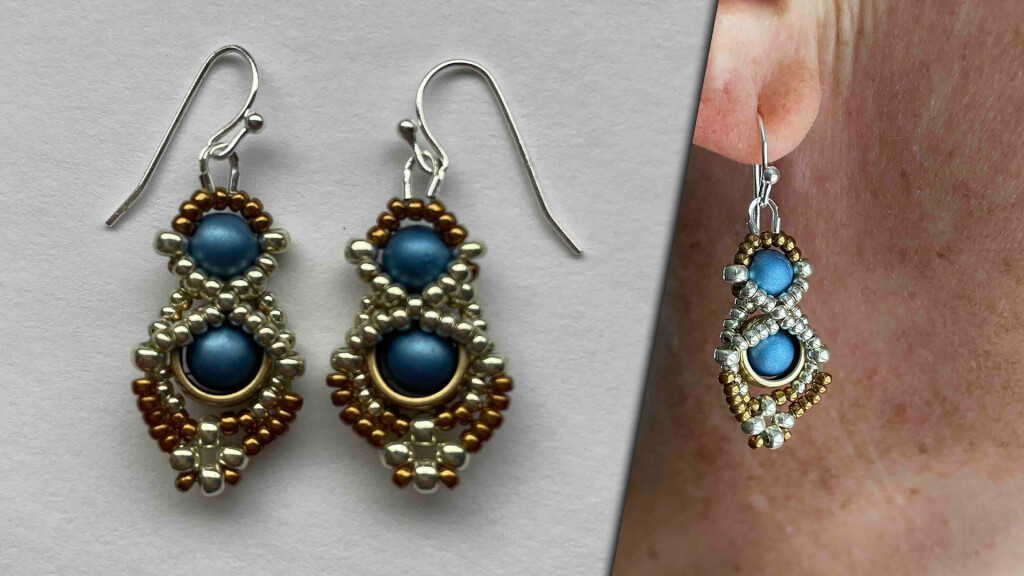
Learn how to create stunning Undercurrent Earrings with this DIY jewelry-making tutorial by PotomacBeads. Using the right-angle weave (RAW) stitch technique, you'll be guided through selecting the right materials, including RounTrio Beads, Miyuki Seed Beads, and Athenacast Halo Beads. Follow our step-by-step instructions to weave intricate patterns and finish your earrings with a professional touch. Perfect for both beginners and experienced beaders, this tutorial will inspire your creativity and help you craft beautiful, high-end jewelry. Find the full list of materials and shop links in the video description.
Prepare Materials:
Gather all beads, thread, and tools listed above.
Start the RAW Stitch:
Thread your needle with Dragon Thread.
Begin with the first RounTrio bead and Halo bead, threading through as demonstrated.
Add 11/0 and 8/0 Miyuki Seed Beads in specified colors around the Halo bead.
Weave the Pattern:
Continue adding beads in the pattern shown, alternating between seed beads and RounTrio beads.
Ensure the beads are tight and form the desired shape.
Add Wire Guard:
Attach the wire guard to the top of the earring, securing with 11/0 seed beads.
Reinforce by threading back through the beads and wire guard.
Create Bottom Design:
Add additional seed beads to form the bottom pattern.
Weave through beads to ensure a secure hold and symmetry.
Finish the Earring:
Attach the ear wire by opening it slightly, slipping it through the wire guard, and closing it securely.
Trim and burn thread ends to prevent fraying.
Repeat for Second Earring:
Follow the same steps to create the matching earring.
Learn how to create beautiful and artistic RounDuo Bangle Stacker Bracelets in this DIY jewelry-making tutorial. Using RounDuo or RounDuo Mini beads paired with 11/0, 15/0, and 8/0 seed beads, this video will guide you through each step, from selecting materials to finishing with a clasp or continuous bangle design.
Learn how to create beautiful and artistic RounDuo Bangle Stacker Bracelets in this DIY jewelry-making tutorial. Using RounDuo or RounDuo Mini beads paired with 11/0, 15/0, and 8/0 seed beads, this video will guide you through each step, from selecting materials to finishing with a clasp or continuous bangle design. Perfect for both beginners and advanced beaders, this project allows for endless creativity with color combinations. Shop the materials needed and follow along to create your own unique bracelet!
Glasgow Rose Embroidered Pendant - DIY Jewelry Making Tutorial by PotomacBeads
Glasgow Rose Embroidered Pendant - DIY Jewelry Making Tutorial by PotomacBeads
Watch Anna Tonnesen as she provides detailed step by step tutorial instructions to learn to embroider with beads. Create the Glasgow Rose pendant or create your own masterpiece of DIY jewelry following this project tutorial. Learn how to lay out your embroidery project, cut and shape your surface, sew on beads, apply the backing and seem the sides of the piece.
Comet Earrings - DIY Jewelry Making Tutorial by PotomacBeads
Flower Gem Earrings - DIY Jewelry Making Tutorial by PotomacBeads
Embroidered Rings - DIY Jewelry Making Tutorial by PotomacBeads
I was looking for the Diamond Duo I mini never found them and not even the Diamond Duo
Share
Stacy D.
05-06-25
Easy to use search engine. I was able to find just what I wanted
Share
Penny R.
05-06-25
As usual, not easy to navigate. What’s with all the extras at checkout?
Share
Janis H.
05-06-25
Excellent website
Share
Jane A.
05-06-25
Thank you Allie for this chance to have some new Potomac patterns as a gift.
Share
Terrie E.
05-06-25
Enjoy shopping on this site.
Share
Sandra G.
05-06-25
Ordering was quick and painless. Good Job!
Share
Loading...
Only Visible on Admin Mode
Item Description
Learn how to create stunning Undercurrent Earrings with this DIY jewelry-making tutorial by PotomacBeads. Using the right-angle weave (RAW) stitch technique, you'll be guided through selecting the right materials, including RounTrio Beads, Miyuki Seed Beads, and Athenacast Halo Beads. Follow our step-by-step instructions to weave intricate patterns and finish your earrings with a professional touch. Perfect for both beginners and experienced beaders, this tutorial will inspire your creativity and help you craft beautiful, high-end jewelry. Find the full list of materials and shop links in the video description.
Prepare Materials:
Gather all beads, thread, and tools listed above.
Start the RAW Stitch:
Thread your needle with Dragon Thread.
Begin with the first RounTrio bead and Halo bead, threading through as demonstrated.
Add 11/0 and 8/0 Miyuki Seed Beads in specified colors around the Halo bead.
Weave the Pattern:
Continue adding beads in the pattern shown, alternating between seed beads and RounTrio beads.
Ensure the beads are tight and form the desired shape.
Add Wire Guard:
Attach the wire guard to the top of the earring, securing with 11/0 seed beads.
Reinforce by threading back through the beads and wire guard.
Create Bottom Design:
Add additional seed beads to form the bottom pattern.
Weave through beads to ensure a secure hold and symmetry.
Finish the Earring:
Attach the ear wire by opening it slightly, slipping it through the wire guard, and closing it securely.
Trim and burn thread ends to prevent fraying.
Repeat for Second Earring:
Follow the same steps to create the matching earring.
Bullet 1
Bullet 2
Bullet 3
You must be logged in to access the wishlist feature.