Paradise Treasure Bracelet Tutorial

  • Picture of Accessories, Bracelet, Jewelry, Necklace, Ornament, Bead
  • Picture of Accessories, Bead, Jewelry, Necklace, Bead Necklace, Ornament, Bracelet
  • Picture of Accessories, Bracelet, Jewelry, Necklace, Locket, Pendant
  • Picture of Blonde, Hair, Person, Accessories, Bracelet, Head, Face
  • Picture of Adult, Female, Person, Woman, Blonde, Hair, Pixie Cut, Bracelet, Head, Face
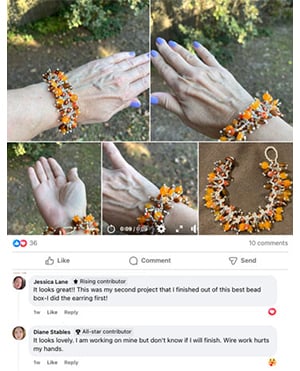
Learn how to create a stunning Paradise Treasure Bracelet in this DIY jewelry-making tutorial by PotomacBeads. This video covers all the materials needed, including RounDuo beads, Miyuki 11/0, 15/0, and 8/0 seed beads, Dragonthread 8, and more. Follow step-by-step instructions to master the right-angle weave stitch technique, with tips on attaching a clasp and incorporating decorative elements like Bicones and Czech cabochons. Perfect for both beginners and experienced beaders, this tutorial will inspire your creativity and help you craft beautiful, personalized bracelets.

Step 1: Choose Your Materials

Step 2: Watch the 
Video Tutorial

Paradise Treasure Bracelet Tutorial
The designer's suggested colors & materials:
  • RounDuo - White lila luster, 28 beads
  • 4mm Bicone - Tanzanite, 7 beads
  • Miyuki 15/0 - Translucent lavender, Up to 247 beads
  • Miyuki 11/0 - Sem-frosted crystal AB, Up to 112 beads
  • Miyuki 8/0 - Duracoat opaque pansy, Up to 37 beads
  • Dragonthread 8 - Gray, About 8 feet
  • Cupbutton - Jet full sliperit, 1 piece
  • Size 12 needle, 1 piece SECOND COLORWAY:
  • RounDuo - White green teal luster, 28 beads
  • 4mm Bicone - Sunflower AB, 7 beads
  • Miyuki 15/0 - Translucent spice, Up to 247 beads
  • Miyuki 11/0 - Frosted opaque glazed rainbow kiwi, Up to 112 beads
  • Miyuki 8/0 - Aluminum silver, Up to 37 beads
  • Dragonthread 8 - Green, About 8 feet
  • 10mm Czech cabochon - White green teal luster, 1 piece
  • 12mm Claspgarten infinite push clasp - Silver, 1 piece
  • E6000 glue, 1-2 drops
  • Size 12 needle, 1 piece
  • Step 3: Need More Help? Follow these Steps

    steps

    Quick Project Steps

    Prepare the Materials: Gather RounDuo beads, seed beads (Miyuki 11/0, 15/0, 8/0), and Dragonthread. Prepare a comfortable thread length. Attach the Clasp: Start with a Cupbutton or cabochon clasp. Attach 11/0 and 8/0 seed beads, passing through the button several times. Right-Angle Weave Base: Use a right-angle weave technique to form the base of the bracelet. Thread through 11/0 seed beads and add RounDuo beads. Add Decorative Components: Incorporate Bicones and additional RounDuo beads, alternating with seed beads. Create decorative patterns along the length. Finish the Length: Continue with the right-angle weave and decoration until the bracelet reaches the desired length. Create the Clasp Loop: Finish the bracelet by making a loop with seed beads for the Cupbutton clasp. Ensure a secure fit and reinforce the thread.

    Step 5: Need Any Extra Materials?

    Step 5: Need Any Extra Materials?

    Potomacbeads Beading Ruler | Advanced | 6x3"
    Beading Mat - Beading Design Mat
    PotomacBeads Pliers - Round Nose Pliers

    Step 6: Choose Your Next Project

    Step 6: Choose Your Next Project

    • Glasgow Rose Embroidered Pendant - DIY Jewelry Making Tutorial by PotomacBeads
    • Glasgow Rose Embroidered Pendant - DIY Jewelry Making Tutorial by PotomacBeads

    Watch Anna Tonnesen as she provides detailed step by step tutorial instructions to learn to embroider with beads. Create the Glasgow Rose pendant or create your own masterpiece of DIY jewelry following this project tutorial. Learn how to lay out your embroidery project, cut and shape your surface, sew on beads, apply the backing and seem the sides of the piece.
    • Comet Earrings - DIY Jewelry Making Tutorial by PotomacBeads
    • Flower Gem Earrings - DIY Jewelry Making Tutorial by PotomacBeads
    • Embroidered Rings - DIY Jewelry Making Tutorial by PotomacBeads
    Join Our Growing Community

    Community profile photo 1
    Community profile photo 2
    Community profile photo 3
    Community profile photo 4

    Our Testimonials

    Only Visible on Admin Mode

    Item Description

    Learn how to create a stunning Paradise Treasure Bracelet in this DIY jewelry-making tutorial by PotomacBeads. This video covers all the materials needed, including RounDuo beads, Miyuki 11/0, 15/0, and 8/0 seed beads, Dragonthread 8, and more. Follow step-by-step instructions to master the right-angle weave stitch technique, with tips on attaching a clasp and incorporating decorative elements like Bicones and Czech cabochons. Perfect for both beginners and experienced beaders, this tutorial will inspire your creativity and help you craft beautiful, personalized bracelets.

    Designer's Material List

    The designer's suggested colors & materials:
  • RounDuo - White lila luster, 28 beads
  • 4mm Bicone - Tanzanite, 7 beads
  • Miyuki 15/0 - Translucent lavender, Up to 247 beads
  • Miyuki 11/0 - Sem-frosted crystal AB, Up to 112 beads
  • Miyuki 8/0 - Duracoat opaque pansy, Up to 37 beads
  • Dragonthread 8 - Gray, About 8 feet
  • Cupbutton - Jet full sliperit, 1 piece
  • Size 12 needle, 1 piece SECOND COLORWAY:
  • RounDuo - White green teal luster, 28 beads
  • 4mm Bicone - Sunflower AB, 7 beads
  • Miyuki 15/0 - Translucent spice, Up to 247 beads
  • Miyuki 11/0 - Frosted opaque glazed rainbow kiwi, Up to 112 beads
  • Miyuki 8/0 - Aluminum silver, Up to 37 beads
  • Dragonthread 8 - Green, About 8 feet
  • 10mm Czech cabochon - White green teal luster, 1 piece
  • 12mm Claspgarten infinite push clasp - Silver, 1 piece
  • E6000 glue, 1-2 drops
  • Size 12 needle, 1 piece
  • Project Steps

    Prepare the Materials: Gather RounDuo beads, seed beads (Miyuki 11/0, 15/0, 8/0), and Dragonthread. Prepare a comfortable thread length. Attach the Clasp: Start with a Cupbutton or cabochon clasp. Attach 11/0 and 8/0 seed beads, passing through the button several times. Right-Angle Weave Base: Use a right-angle weave technique to form the base of the bracelet. Thread through 11/0 seed beads and add RounDuo beads. Add Decorative Components: Incorporate Bicones and additional RounDuo beads, alternating with seed beads. Create decorative patterns along the length. Finish the Length: Continue with the right-angle weave and decoration until the bracelet reaches the desired length. Create the Clasp Loop: Finish the bracelet by making a loop with seed beads for the Cupbutton clasp. Ensure a secure fit and reinforce the thread.