A Portal to Royalty Tutorial

  • Picture of Accessories, Bracelet, Jewelry, Necklace, Bead, Bead Necklace, Ornament
  • Picture of Accessories, Bead, Bead Necklace, Jewelry, Ornament, Necklace
  • Picture of Accessories, Bracelet, Jewelry
  • Picture of Body Part, Hip, Person, Accessories, Bracelet, Jewelry
  • Picture of Body Part, Hip, Person, Accessories, Bracelet, Jewelry
Create your own beautiful "A Portal to Royalty" bracelet with this DIY jewelry-making tutorial by PotomacBeads. In this video, you will learn how to use Pi Duos, 11/0 and 15/0 seed beads, and sparkling 4mm bicone crystals to craft a stunning bracelet. This tutorial covers the double right-angle weave technique, embellishment techniques, and creating a secure clasp with a cup button. Gather your beading supplies, including a size 12 beading needle and thread, and follow along with step-by-step instructions. Make this project your own by choosing your favorite color combinations and adding personal touches!

Step 1: Choose Your Materials

Step 2: Watch the 
Video Tutorial

A Portal to Royalty Tutorial
The designer's suggested colors & materials
  • PieDuo - Jet bronze, 28 beads
  • 4mm Bicone - Aqua, 29 beads
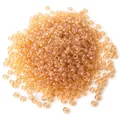
  • Miyuki 11/0 - Matte transparent rootbeer, Up to 249 beads
  • Miyuki 11/0 - Duracoat opaque Nile blue, Up to 249 beads
  • Miyuki 15/0 - Matte opaque dark cream AB, Up to 302 beads
  • Miyuki 15/0 - Duracoat opaque dark salmon, Up to 302 beads
  • Dragonthread 8 - White, About 10 feet
  • Table-cut cup button - Opaque white travertine, 1 piece
  • Size 12 needle, 1 bead SECOND COLORWAY:
  • PieDuo - Metallic sea blue, 28 beads
  • 4mm Bicone - Hyacinth, 29 beads
  • Miyuki 11/0 - Matte white, Up to 249 beads
  • Miyuki 11/0 - White pearl ceylon, Up to 249 beads
  • Miyuki 15/0 - Duracoat opaque kumquat, Up to 302 beads
  • Miyuki 15/0 - Duracoat opaque bayberry, Up to 302 beads
  • Dragonthread 8 - White, About 10 feet
  • Table-cut cupbutton - Opaque orange tranvertine, 1 piece
  • Size 12 needle, 1 piece
  • Step 3: Need More Help? Follow these Steps

    steps

    Quick Project Steps

    Attach the Clasp: Thread a size 12 beading needle with about 1.5 meters of thread. Pick up three 11/0 seed beads and one cup button. Create a loop by going back through the seed beads and secure with a knot. Create the Base with Right-Angle Weave: Add four 11/0 seed beads to create a square. Use the double right-angle weave technique to form the base of the bracelet. Add the Pi Duos and Embellishments: Add two Pi Duos, one 15/0 seed bead, and one 11/0 seed bead to form the main pattern. Embellish with 4mm bicone crystals between Pi Duos. Expand with Double Right-Angle Weave Sections: Continue adding right-angle weave sections with Pi Duos and embellishments until you reach the desired length. Finish the Bracelet with a Loop for the Clasp: Attach 11/0 seed beads and form a loop that fits around the cup button. Reinforce the loop by going through the beads several times. Secure and Tie Off the Thread: Make half-hitch knots between beads to secure the thread. Use a thread burner or scissors to trim excess thread.

    Step 5: Need Any Extra Materials?

    Step 5: Need Any Extra Materials?

    Potomacbeads Beading Ruler | Advanced | 6x3"
    Beading Mat - Beading Design Mat
    PotomacBeads Pliers - Round Nose Pliers

    Step 6: Choose Your Next Project

    Step 6: Choose Your Next Project

    • Glasgow Rose Embroidered Pendant - DIY Jewelry Making Tutorial by PotomacBeads
    • Glasgow Rose Embroidered Pendant - DIY Jewelry Making Tutorial by PotomacBeads

    Watch Anna Tonnesen as she provides detailed step by step tutorial instructions to learn to embroider with beads. Create the Glasgow Rose pendant or create your own masterpiece of DIY jewelry following this project tutorial. Learn how to lay out your embroidery project, cut and shape your surface, sew on beads, apply the backing and seem the sides of the piece.
    • Comet Earrings - DIY Jewelry Making Tutorial by PotomacBeads
    • Flower Gem Earrings - DIY Jewelry Making Tutorial by PotomacBeads
    • Embroidered Rings - DIY Jewelry Making Tutorial by PotomacBeads

    Join Our Growing Community

    Community profile photo 1
    Community profile photo 2
    Community profile photo 3
    Community profile photo 4

    Our Testimonials

    Only Visible on Admin Mode

    Item Description

    Create your own beautiful "A Portal to Royalty" bracelet with this DIY jewelry-making tutorial by PotomacBeads. In this video, you will learn how to use Pi Duos, 11/0 and 15/0 seed beads, and sparkling 4mm bicone crystals to craft a stunning bracelet. This tutorial covers the double right-angle weave technique, embellishment techniques, and creating a secure clasp with a cup button. Gather your beading supplies, including a size 12 beading needle and thread, and follow along with step-by-step instructions. Make this project your own by choosing your favorite color combinations and adding personal touches!

    Designer's Material List

    The designer's suggested colors & materials
  • PieDuo - Jet bronze, 28 beads
  • 4mm Bicone - Aqua, 29 beads
  • Miyuki 11/0 - Matte transparent rootbeer, Up to 249 beads
  • Miyuki 11/0 - Duracoat opaque Nile blue, Up to 249 beads
  • Miyuki 15/0 - Matte opaque dark cream AB, Up to 302 beads
  • Miyuki 15/0 - Duracoat opaque dark salmon, Up to 302 beads
  • Dragonthread 8 - White, About 10 feet
  • Table-cut cup button - Opaque white travertine, 1 piece
  • Size 12 needle, 1 bead SECOND COLORWAY:
  • PieDuo - Metallic sea blue, 28 beads
  • 4mm Bicone - Hyacinth, 29 beads
  • Miyuki 11/0 - Matte white, Up to 249 beads
  • Miyuki 11/0 - White pearl ceylon, Up to 249 beads
  • Miyuki 15/0 - Duracoat opaque kumquat, Up to 302 beads
  • Miyuki 15/0 - Duracoat opaque bayberry, Up to 302 beads
  • Dragonthread 8 - White, About 10 feet
  • Table-cut cupbutton - Opaque orange tranvertine, 1 piece
  • Size 12 needle, 1 piece
  • Project Steps

    Attach the Clasp: Thread a size 12 beading needle with about 1.5 meters of thread. Pick up three 11/0 seed beads and one cup button. Create a loop by going back through the seed beads and secure with a knot. Create the Base with Right-Angle Weave: Add four 11/0 seed beads to create a square. Use the double right-angle weave technique to form the base of the bracelet. Add the Pi Duos and Embellishments: Add two Pi Duos, one 15/0 seed bead, and one 11/0 seed bead to form the main pattern. Embellish with 4mm bicone crystals between Pi Duos. Expand with Double Right-Angle Weave Sections: Continue adding right-angle weave sections with Pi Duos and embellishments until you reach the desired length. Finish the Bracelet with a Loop for the Clasp: Attach 11/0 seed beads and form a loop that fits around the cup button. Reinforce the loop by going through the beads several times. Secure and Tie Off the Thread: Make half-hitch knots between beads to secure the thread. Use a thread burner or scissors to trim excess thread.