• Jewelry-Making Supplies
  • Kits & Collections
  • Subscriptions
  • Learn to Make
  • Discounts & Deals

Taj Mahal Bracelet Tutorial

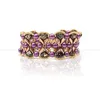
Learn to create the Taj Mahal Bracelet, a versatile design using PieDuos, RounDuos, StormDuos, and 15/0 seed beads, strung with Green Dragon thread and secured with a cup button clasp. The process begins with RounDuos and StormDuos arranged in a floral pattern for symmetry, followed by reinforcing the structure and adding PieDuos for decoration. Using the right-angle weave technique, the bracelet is strengthened with 15/0 seed beads to ensure durability. A five-seed bead loop forms the clasp, and the design can be extended into a necklace or customized with different bead placements.

Step 1: Choose Your Materials

Step 2: Watch the 
Video Tutorial

Taj Mahal Bracelet Tutorial
The designer's suggested colors & materials:
  • PieDuo Beads - Jet Gold Splash, 26 Beads
  • StormDuo Beads - Crystal Capri Gold Full, 28 Beads
  • RounDuo Beads - Pastel Bordeaux 5mm, 46 Beads
  • Miyuki Seed Beads - Duracoat Galvanized Gold 15/0, ~6 Grams
  • Cup Buttons - Jet Picasso, 1 Piece
  • Step 3: Need More Help? Follow these Steps

    steps

    Quick Project Steps

    Gather Your Materials: Beads: PieDuos, RounDuos, StormDuos, 15/0 Seed Beads. Thread: Green Dragon Thread (Size 8). Clasp: Cup Button. Needle: Size 10-12 Beading Needle Prepare the Thread & Stop Bead: Cut about 5 feet of thread and thread your needle. Add a stop bead at the end, leaving a 3-inch tail. Create the Base Structure: String one Round Duo bead followed by one Storm Duo, repeating until you have the desired bracelet length. Ensure Storm Duos are facing the same direction for symmetry. Reinforce the First Layer: Pass through all beads a second time to strengthen the structure. Pull the thread tight to prevent gaps between beads. Add Pie Duos for the Decorative Layer: Weave through the open holes of RounDuos to attach PieDuos. Keep bead tension firm to maintain structure. Connect Beads Using Right-Angle Weave: Use a right-angle weave technique to attach 15/0 seed beads around the design. This step helps keep the bracelet sturdy and polished. Create the Clasp Loop: Pick up five 15/0 seed beads and form a loop for the cup button closure. Reinforce by weaving through the loop twice. Secure the Thread & Finish: Pass the thread back through multiple beads to hide knots. Tie a secure knot and weave excess thread into the bracelet before trimming. Customize & Adjust: Extend the design into a necklace by repeating the pattern. Experiment with different bead colors or alternative clasps for a unique style.

    Step 5: Need Any Extra Materials?

    • Potomacbeads Beading Ruler | Ultimate | Crystal | 9x3"
    • Thread Zap II
    • BeadTec Beading Needles Sizes 10, 11, 12 | Mix Pack of 6
    • Plastic Caliper Tool - White
    • BeadTec DragonThread - Crystal/White | Size 6 (Medium) | 50 Meter Spool
    • BeadTec DragonThread - Green | Size 6 (Medium) | 50 Meter Spool

    Step 5: Need Any Extra Materials?

    BeadTec Beading Ruler | Advanced | 6x3"
    Taj Mahal Bracelet Tutorial
    PotomacBeads Pliers - Round Nose Pliers

    Step 6: Choose Your Next Project

    • Learn how to create beautiful and artistic RounDuo Bangle Stacker Bracelets in this DIY jewelry-making tutorial. Using RounDuo or RounDuo Mini beads paired with 11/0, 15/0, and 8/0 seed beads, this video will guide you through each step, from selecting materials to finishing with a clasp or continuous bangle design.

      Read More

    Step 6: Choose Your Next Project

    • Glasgow Rose Embroidered Pendant - DIY Jewelry Making Tutorial by PotomacBeads
    • Glasgow Rose Embroidered Pendant - DIY Jewelry Making Tutorial by PotomacBeads

    Watch Anna Tonnesen as she provides detailed step by step tutorial instructions to learn to embroider with beads. Create the Glasgow Rose pendant or create your own masterpiece of DIY jewelry following this project tutorial. Learn how to lay out your embroidery project, cut and shape your surface, sew on beads, apply the backing and seem the sides of the piece.
    • Comet Earrings - DIY Jewelry Making Tutorial by PotomacBeads
    • Flower Gem Earrings - DIY Jewelry Making Tutorial by PotomacBeads
    • Embroidered Rings - DIY Jewelry Making Tutorial by PotomacBeads

    Join Our Growing Community

    Community profile photo 1
    Community profile photo 2
    Community profile photo 3
    Community profile photo 4

    Our Testimonials

    • 5
      5643 (83.8%)
    • 4
      763 (11.3%)
    • 3
      275 (4.1%)
    • 2
      31 (0.5%)
    • 1
      25 (0.4%)
    95% of customers rate this company 4- or 5-stars
    Newest to Oldest
    • Favorite Reviews
    • Highest to Lowest
    • Newest to Oldest
    All Ratings
    • All Ratings
    • 5 ★ Reviews
    • 4 ★ Reviews
    • 3 ★ Reviews
    • 2 ★ Reviews
    • 1 ★ Reviews
    Andromeda P. Verified Customer
    04-04-25

    Just soooo much to pick from

    Tracy L. Verified Customer
    04-04-25

    My local bead store closed and I have had to shop at three different stores to get some of the products I use. On finding Potamac Beads, it's now a one stop shopping. They carry the types of beads I use! I'm very happy!

    Alicia R. Verified Customer
    04-04-25

    Love your products, your videos and your variety of beads and closures! Prices are reasonable too!

    Donna G. Verified Customer
    04-04-25

    Very easy web site. Good inventory.

    Rebecca R. Verified Customer
    04-04-25

    Easy to navigate website and good prices. Hard to find beads are always here and in stock!

    Semantha R. Verified Customer
    04-03-25

    thank you,

    Cara J. Verified Customer
    04-03-25

    Your website had all the beads I needed.

    Anthony V. Verified Customer
    04-03-25

    was easy

    Leslie M. Verified Customer
    04-03-25

    Easy to find what I needed

    Tracy C. Verified Customer
    04-03-25

    I have enjoyed the site, and have my first order coming in the mail. I watch on you tube, and decided to subscribe to both boxes.

    Only Visible on Admin Mode

    Item Description

    Learn to create the Taj Mahal Bracelet, a versatile design using PieDuos, RounDuos, StormDuos, and 15/0 seed beads, strung with Green Dragon thread and secured with a cup button clasp. The process begins with RounDuos and StormDuos arranged in a floral pattern for symmetry, followed by reinforcing the structure and adding PieDuos for decoration. Using the right-angle weave technique, the bracelet is strengthened with 15/0 seed beads to ensure durability. A five-seed bead loop forms the clasp, and the design can be extended into a necklace or customized with different bead placements.

    Designer's Material List

    The designer's suggested colors & materials:
  • PieDuo Beads - Jet Gold Splash, 26 Beads
  • StormDuo Beads - Crystal Capri Gold Full, 28 Beads
  • RounDuo Beads - Pastel Bordeaux 5mm, 46 Beads
  • Miyuki Seed Beads - Duracoat Galvanized Gold 15/0, ~6 Grams
  • Cup Buttons - Jet Picasso, 1 Piece
  • Project Steps

    Gather Your Materials: Beads: PieDuos, RounDuos, StormDuos, 15/0 Seed Beads. Thread: Green Dragon Thread (Size 8). Clasp: Cup Button. Needle: Size 10-12 Beading Needle Prepare the Thread & Stop Bead: Cut about 5 feet of thread and thread your needle. Add a stop bead at the end, leaving a 3-inch tail. Create the Base Structure: String one Round Duo bead followed by one Storm Duo, repeating until you have the desired bracelet length. Ensure Storm Duos are facing the same direction for symmetry. Reinforce the First Layer: Pass through all beads a second time to strengthen the structure. Pull the thread tight to prevent gaps between beads. Add Pie Duos for the Decorative Layer: Weave through the open holes of RounDuos to attach PieDuos. Keep bead tension firm to maintain structure. Connect Beads Using Right-Angle Weave: Use a right-angle weave technique to attach 15/0 seed beads around the design. This step helps keep the bracelet sturdy and polished. Create the Clasp Loop: Pick up five 15/0 seed beads and form a loop for the cup button closure. Reinforce by weaving through the loop twice. Secure the Thread & Finish: Pass the thread back through multiple beads to hide knots. Tie a secure knot and weave excess thread into the bracelet before trimming. Customize & Adjust: Extend the design into a necklace by repeating the pattern. Experiment with different bead colors or alternative clasps for a unique style.