11/0 seed beads (Ivory Ceylon and Galvanized Gold mentioned)
Miyuki 3.4mm drop beads (Black Bronze color mentioned)
8mm round bead (Marbleized Pyrite and Cat's Eye mentioned)
6mm soldered ring
Super New Glue
Size 10 beading needle
Wildfire beading thread (0.006", white color)
Scissors and thread burner
Step 3: Need More Help? Follow these Steps
Quick Project Steps
Gather materials: 11/0 seed beads, Miyuki drops, 8mm round bead, beading thread, needle, and tools.
Thread the needle with 2 feet of beading thread, add a seed bead and a teardrop, and secure with a knot.
Add 20 11/0 seed beads, followed by the 8mm bead and loop through a soldered ring.
Repeat the bead addition process for each tassel strand, ensuring even spacing and length.
After adding the desired number of strands, finish the tassel by knotting the thread and applying glue to secure the ends.
For a necklace, consider adding more beads and knots for a cohesive design.
Have you been intimidated to bezel a Rivoli? Learn how to Hubble stitch a seed beaded bezel on an 18mm Potomac crystal Rivoli. Using Hubble stitch is a fast and easy way to make sure to get a secure and beautiful bezel. More from Hubble Stitch Creator Melanie De Miguel: https://beadschool.co.uk/ Project Length/Size: 1.
Have you been intimidated to bezel a Rivoli? Learn how to Hubble stitch a seed beaded bezel on an 18mm Potomac crystal Rivoli. Using Hubble stitch is a fast and easy way to make sure to get a secure and beautiful bezel. More from Hubble Stitch Creator Melanie De Miguel: https://beadschool.co.uk/ Project Length/Size: 1.5" Technique Learned: Hubble Stitch
Project Length/Size: 1.5"
Technique Learned: Hubble Stitch
Glasgow Rose Embroidered Pendant - DIY Jewelry Making Tutorial by PotomacBeads
Glasgow Rose Embroidered Pendant - DIY Jewelry Making Tutorial by PotomacBeads
Watch Anna Tonnesen as she provides detailed step by step tutorial instructions to learn to embroider with beads. Create the Glasgow Rose pendant or create your own masterpiece of DIY jewelry following this project tutorial. Learn how to lay out your embroidery project, cut and shape your surface, sew on beads, apply the backing and seem the sides of the piece.
Comet Earrings - DIY Jewelry Making Tutorial by PotomacBeads
Flower Gem Earrings - DIY Jewelry Making Tutorial by PotomacBeads
Embroidered Rings - DIY Jewelry Making Tutorial by PotomacBeads
For my first purchase (3 month subscription box), I'm a little disappointed. The instructions are good and the videos (YouTube) are excellent. The beads are very pretty. Unfortunately, I did not receive enough beads to finish one of the projects. Some of the beads also had holes fused shut. I tried reaching out to customer support via the website and haven't heard back yet. I intend to keep trying their products because their designs are so pretty and the videos are so well done. Maybe I just got unlucky with my first project.
It was easy to find what I wanted. Very easy and secure.
Share
Janet M.
04-16-25
A great supply of beautiful beads for their hundreds of lovely patterns!
Share
Erica C.
04-16-25
Great products with helpful videos to make a new to beading crafter feel welcome.
Share
Anne D.
04-16-25
Great beads
Share
Dana P.
04-16-25
Always a great site to shop
Share
Margaret R.
04-16-25
Hi
Share
Rebecca R.
04-16-25
Easy to navigate website and good prices. Hard to find beads are always here and in stock!
Share
Lisa G.
04-16-25
It was a lot of back & forth to find items to make an online pattern
Share
Loading...
Only Visible on Admin Mode
Item Description
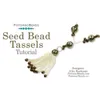
This is the PotomacBeads tutorial teaching you how to make the "Seed Bead Tassels".
Designer's Material List
The Designer’s suggested colors and materials:
11/0 seed beads (Ivory Ceylon and Galvanized Gold mentioned)
Miyuki 3.4mm drop beads (Black Bronze color mentioned)
8mm round bead (Marbleized Pyrite and Cat's Eye mentioned)
6mm soldered ring
Super New Glue
Size 10 beading needle
Wildfire beading thread (0.006", white color)
Scissors and thread burner
Project Steps
Gather materials: 11/0 seed beads, Miyuki drops, 8mm round bead, beading thread, needle, and tools.
Thread the needle with 2 feet of beading thread, add a seed bead and a teardrop, and secure with a knot.
Add 20 11/0 seed beads, followed by the 8mm bead and loop through a soldered ring.
Repeat the bead addition process for each tassel strand, ensuring even spacing and length.
After adding the desired number of strands, finish the tassel by knotting the thread and applying glue to secure the ends.
For a necklace, consider adding more beads and knots for a cohesive design.
Bullet 1
Bullet 2
Bullet 3
You must be logged in to access the wishlist feature.