- Jewelry-Making Supplies ▾
Design Jewelry with Confidence!
Seed Beads
Thread, Wire, & Stringing Materials
Athenacast Findings & Components
Everything Else
- Kits & Collections ▾
Assemble Your World
Kits & Collections
- Subscriptions ▾
Want monthly Beading Happiness?
Subscriptions
- Learn to Make ▾
Want to learn more?
- Discounts & Deals ▾
Explore Today's Promotions!
- Jewelry-Making Supplies
- Kits & Collections
- Subscriptions
- Learn to Make
- Discounts & Deals
-
Seed Beads
Thread, Wire, & Stringing Materials
Findings & Components
Everything Else
-
Kits & Collections
-
Subscriptions
- Home
- How to Make Jewelry
- Projects By Bead Type
- Seed Bead Projects
- Button KNotted Necklace Tutorial
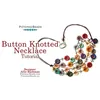
Button KNotted Necklace Tutorial

Step 1: Choose Your Materials
Step 1: Choose Your Materials
Step 2: Watch the
Video Tutorial
Step 2: Watch the
Video Tutorial
Potomac Table Cut Buttons - Mixed 10 Pack, ~ 36 Pieces
Waxed Linen Cording - Brown, ~ 13 Feet
Antique Silver Irregular Spacers, ~ 20 Pieces
Silver Plated Oval Clip Clasp, 1 Piece
Step 3: Need More Help? Follow these Steps
Step 3: Need More Help? Follow these Steps

Quick Project Steps
Quick Project Steps
Attach the Clasp: Securely tie the cording onto a silver-plated oval clip clasp using a loop method.
Begin Beading: Start by tying an overhand knot six inches from the clasp to designate the beginning of your beadwork.
Add Spacers and Buttons: Alternate between adding antique silver irregular spacers and Potomac table cut buttons, securing each with a knot.
Continue Beading: Work each strand one at a time, adding beads and buttons to your liking, ensuring a balanced design.
Final Knotting: Tie off the ends neatly and attach them to the other side of the clasp to complete your necklace.
Step 5: Need Any Extra Materials?
Step 5: Need Any Extra Materials?
Step 5: Need Any Extra Materials?
Step 5: Need Any Extra Materials?
Step 6: Choose Your Next Project
Step 6: Choose Your Next Project
- Create a double or tripple leather wrap with an extra flair. Use seed beads to create a delicate border to showcase a mosaic of gemstones, crystals and glass. This wrap is comfortable to wear and makes a great piece to take (or make) on a summer vacation destination.Create a double or tripple leather wrap with an extra flair. Use seed beads to create a delicate border to showcase a mosaic of gemstones, crystals and glass. This wrap is comfortable to wear and makes a great piece to take (or make) on a summer vacation destination.
Step 6: Choose Your Next Project
Step 6: Choose Your Next Project
- Glasgow Rose Embroidered Pendant - DIY Jewelry Making Tutorial by PotomacBeads
- Glasgow Rose Embroidered Pendant - DIY Jewelry Making Tutorial by PotomacBeads
- Comet Earrings - DIY Jewelry Making Tutorial by PotomacBeads
- Flower Gem Earrings - DIY Jewelry Making Tutorial by PotomacBeads
- Embroidered Rings - DIY Jewelry Making Tutorial by PotomacBeads
Join Our Growing Community
Join Our Growing Community


Our Testimonials
Our Testimonials
- 55940 (83.7%)
- 4808 (11.4%)
- 3293 (4.1%)
- 230 (0.4%)
- 123 (0.3%)
- Favorite Reviews
- Highest to Lowest
- Newest to Oldest
- All Ratings
- 5 ★ Reviews
- 4 ★ Reviews
- 3 ★ Reviews
- 2 ★ Reviews
- 1 ★ Reviews
Of the items I have received, they are well made. The offer of free patterns to subscribe has not panned out, as I have never received them. I have emailed, but have not received a reply. Their ordering system does not work right for these "free" patterns, and I ended up paying for one of them. The "continue to checkout" will only work with the billing address and not the shipping address, so there they all sit, in my orders tab, with just ship to United States on them. They have not even been shipped. There is no way to correct this, and they do not answer my emails.
Loading...
Only Visible on Admin Mode
Item Description
Designer's Material List
Potomac Table Cut Buttons - Mixed 10 Pack, ~ 36 Pieces
Waxed Linen Cording - Brown, ~ 13 Feet
Antique Silver Irregular Spacers, ~ 20 Pieces
Silver Plated Oval Clip Clasp, 1 Piece
Project Steps
Attach the Clasp: Securely tie the cording onto a silver-plated oval clip clasp using a loop method.
Begin Beading: Start by tying an overhand knot six inches from the clasp to designate the beginning of your beadwork.
Add Spacers and Buttons: Alternate between adding antique silver irregular spacers and Potomac table cut buttons, securing each with a knot.
Continue Beading: Work each strand one at a time, adding beads and buttons to your liking, ensuring a balanced design.
Final Knotting: Tie off the ends neatly and attach them to the other side of the clasp to complete your necklace.
Highest Quality
Products
100% Money
Back Guarantee
Fast
Shipping
Best Teaching &
Customer Service
You'll want these emails...
Get Free Projects & Inspiration
Get Free Projects & Inspiration
- Bullet 1
- Bullet 2
- Bullet 3
Copyright © PotomacBeads


