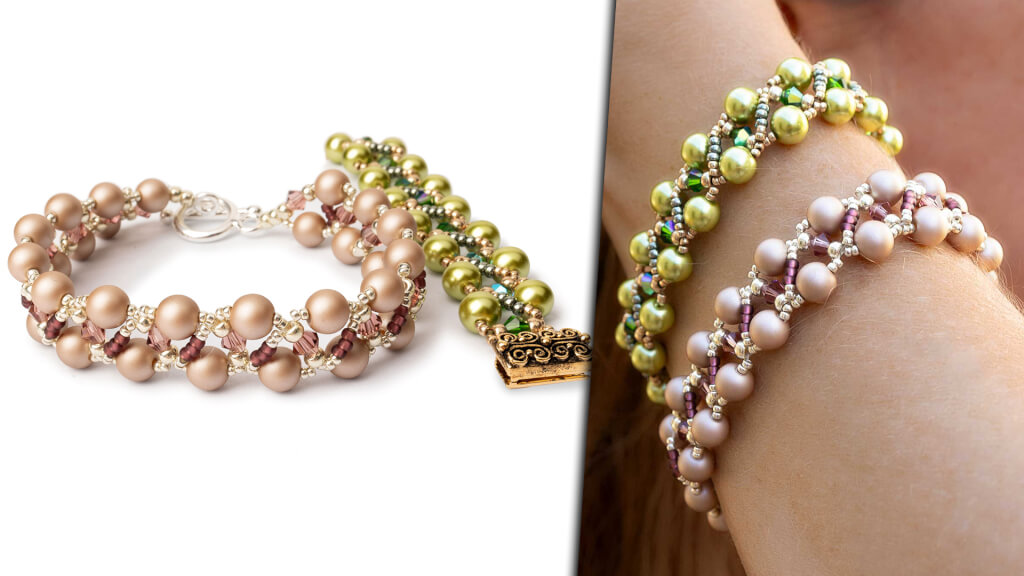
Create a stunning Crossing Colors Bracelet using the Right Angle Weave (RAW) technique in this step-by-step DIY jewelry tutorial by PotomacBeads. In this video, you'll learn how to combine 6mm pearls, 4mm bicones, and various sizes of seed beads (15/0, 11/0, 8/0) to craft a unique bracelet with a beautiful angled pattern. Whether you're a beginner or an experienced beader, this project is perfect for honing your skills and creating wearable art. Check the links below for the full list of materials and color variations!
Step 1: Prepare your materials, including pearls, bicones, and seed beads. Cut about 5 feet of Dragon Thread and add a stop bead.
Step 2: Start the Right Angle Weave (RAW) by creating the first unit with four sides using pearls, bicones, and seed beads.
Step 3: Continue building more units, connecting them by sewing through adjacent beads.
Step 4: Attach the two-strand Garden Clasp using seed beads to form a secure loop on each side. Reinforce the thread multiple times for durability.
Step 5: Add the diagonal embellishment by stitching through the top layer with seed beads in a repeating pattern to create the zigzag effect.
Step 6: Finish by tying off and burning the thread ends. Ensure all beads and the clasp are tightly secured.
Learn how to create beautiful and artistic RounDuo Bangle Stacker Bracelets in this DIY jewelry-making tutorial. Using RounDuo or RounDuo Mini beads paired with 11/0, 15/0, and 8/0 seed beads, this video will guide you through each step, from selecting materials to finishing with a clasp or continuous bangle design.
Learn how to create beautiful and artistic RounDuo Bangle Stacker Bracelets in this DIY jewelry-making tutorial. Using RounDuo or RounDuo Mini beads paired with 11/0, 15/0, and 8/0 seed beads, this video will guide you through each step, from selecting materials to finishing with a clasp or continuous bangle design. Perfect for both beginners and advanced beaders, this project allows for endless creativity with color combinations. Shop the materials needed and follow along to create your own unique bracelet!
Glasgow Rose Embroidered Pendant - DIY Jewelry Making Tutorial by PotomacBeads
Glasgow Rose Embroidered Pendant - DIY Jewelry Making Tutorial by PotomacBeads
Watch Anna Tonnesen as she provides detailed step by step tutorial instructions to learn to embroider with beads. Create the Glasgow Rose pendant or create your own masterpiece of DIY jewelry following this project tutorial. Learn how to lay out your embroidery project, cut and shape your surface, sew on beads, apply the backing and seem the sides of the piece.
Comet Earrings - DIY Jewelry Making Tutorial by PotomacBeads
Flower Gem Earrings - DIY Jewelry Making Tutorial by PotomacBeads
Embroidered Rings - DIY Jewelry Making Tutorial by PotomacBeads
I found exactly what I needed at a reasonable price.
Share
CAROLYN D.
04-23-25
EASY
Share
Joy P.
04-23-25
So easy to order.
Share
Sonja G.
04-23-25
Didn’t really have many color choices
Share
Penny K.
04-23-25
Disappointed that so many colors of amos par puca beads are out of stock.
Share
Laura P.
04-23-25
Great product, fast turnaround. Had 1 of the Rivoli come in damaged and no problem getting a new one sent out.
Share
Staci S.
04-23-25
It was quick service and nice quality
Share
A Reviewer
04-23-25
Good
Share
Alicia M.
04-23-25
Your system is really working, which is great
Share
Loading...
Only Visible on Admin Mode
Item Description
Create a stunning Crossing Colors Bracelet using the Right Angle Weave (RAW) technique in this step-by-step DIY jewelry tutorial by PotomacBeads. In this video, you'll learn how to combine 6mm pearls, 4mm bicones, and various sizes of seed beads (15/0, 11/0, 8/0) to craft a unique bracelet with a beautiful angled pattern. Whether you're a beginner or an experienced beader, this project is perfect for honing your skills and creating wearable art. Check the links below for the full list of materials and color variations!
Designer's Material List
The designer's suggested colors & materials:
Potomac Pearls - Pastel Green 6mm, 34 Beads
Potomac Crystal Bicone Beads - Dark Moss Green AB 4mm, 17 Beads
Miyuki Seed Beads - Duracoat Galvanized Dark Steel Green 11/0, ~ 1 Gram
Step 1: Prepare your materials, including pearls, bicones, and seed beads. Cut about 5 feet of Dragon Thread and add a stop bead.
Step 2: Start the Right Angle Weave (RAW) by creating the first unit with four sides using pearls, bicones, and seed beads.
Step 3: Continue building more units, connecting them by sewing through adjacent beads.
Step 4: Attach the two-strand Garden Clasp using seed beads to form a secure loop on each side. Reinforce the thread multiple times for durability.
Step 5: Add the diagonal embellishment by stitching through the top layer with seed beads in a repeating pattern to create the zigzag effect.
Step 6: Finish by tying off and burning the thread ends. Ensure all beads and the clasp are tightly secured.
Bullet 1
Bullet 2
Bullet 3
You must be logged in to access the wishlist feature.