- Jewelry-Making Supplies ▾
Design Jewelry with Confidence!
Seed Beads
Thread, Wire, & Stringing Materials
Athenacast Findings & Components
Everything Else
- Kits & Collections ▾
Assemble Your World
Kits & Collections
- Subscriptions ▾
Want monthly Beading Happiness?
Subscriptions
- Learn to Make ▾
Want to learn more?
- Discounts & Deals ▾
Explore Today's Promotions!
- Jewelry-Making Supplies
- Kits & Collections
- Subscriptions
- Learn to Make
- Discounts & Deals
-
Seed Beads
Thread, Wire, & Stringing Materials
Findings & Components
Everything Else
-
Kits & Collections
-
Subscriptions
- Home
- How to Make Jewelry
- Projects By Bead Type
- Seed Bead 6/0 Projects
- Stretch Bracelets Tutorial
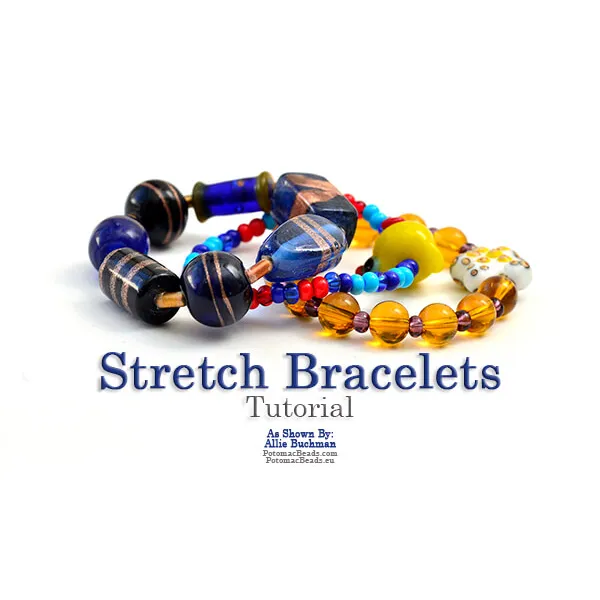
Stretch Bracelets Tutorial

Step 2: Watch the
Video Tutorial
Step 2: Watch the
Video Tutorial
Step 3: Need More Help? Follow these Steps
Step 3: Need More Help? Follow these Steps

Quick Project Steps
Quick Project Steps
Measure and Cut the String: Measure the wrist size and cut the stretchy string approximately one and a half times longer than the wrist measurement.
Secure the String: Attach a bead stopper to one end of the string to prevent beads from falling off.
String Your Beads: Create a pattern or choose beads at random to string onto the stretchy string.
Tying the Knot: Once all beads are strung, remove the bead stopper and tie a square knot by alternating the strings in your hands and pulling tightly.
Hide the Knot: If possible, thread one end of the string through a bead with a larger hole to hide the knot.
Finish Your Bracelet: Trim the excess string and your stretch bracelet is ready to wear!
Step 4: Pick Your Own Colors
Step 4: Pick Your Own Colors
Step 5: Need Any Extra Materials?
Step 5: Need Any Extra Materials?
Step 5: Need Any Extra Materials?
Step 5: Need Any Extra Materials?
Step 6: Choose Your Next Project
Step 6: Choose Your Next Project
- Create a double or tripple leather wrap with an extra flair. Use seed beads to create a delicate border to showcase a mosaic of gemstones, crystals and glass. This wrap is comfortable to wear and makes a great piece to take (or make) on a summer vacation destination.Create a double or tripple leather wrap with an extra flair. Use seed beads to create a delicate border to showcase a mosaic of gemstones, crystals and glass. This wrap is comfortable to wear and makes a great piece to take (or make) on a summer vacation destination.
Step 6: Choose Your Next Project
Step 6: Choose Your Next Project
- Glasgow Rose Embroidered Pendant - DIY Jewelry Making Tutorial by PotomacBeads
- Glasgow Rose Embroidered Pendant - DIY Jewelry Making Tutorial by PotomacBeads
- Comet Earrings - DIY Jewelry Making Tutorial by PotomacBeads
- Flower Gem Earrings - DIY Jewelry Making Tutorial by PotomacBeads
- Embroidered Rings - DIY Jewelry Making Tutorial by PotomacBeads
Join Our Growing Community
Join Our Growing Community


Our Testimonials
Our Testimonials
- 56012 (83.8%)
- 4814 (11.3%)
- 3296 (4.1%)
- 230 (0.4%)
- 124 (0.3%)
- Favorite Reviews
- Highest to Lowest
- Newest to Oldest
- All Ratings
- 5 ★ Reviews
- 4 ★ Reviews
- 3 ★ Reviews
- 2 ★ Reviews
- 1 ★ Reviews
Loading...
Only Visible on Admin Mode
Item Description
Designer's Material List
Project Steps
Measure and Cut the String: Measure the wrist size and cut the stretchy string approximately one and a half times longer than the wrist measurement.
Secure the String: Attach a bead stopper to one end of the string to prevent beads from falling off.
String Your Beads: Create a pattern or choose beads at random to string onto the stretchy string.
Tying the Knot: Once all beads are strung, remove the bead stopper and tie a square knot by alternating the strings in your hands and pulling tightly.
Hide the Knot: If possible, thread one end of the string through a bead with a larger hole to hide the knot.
Finish Your Bracelet: Trim the excess string and your stretch bracelet is ready to wear!
Highest Quality
Products
100% Money
Back Guarantee
Fast
Shipping
Best Teaching &
Customer Service
You'll want these emails...
Get Free Projects & Inspiration
Get Free Projects & Inspiration
- Bullet 1
- Bullet 2
- Bullet 3
Copyright © PotomacBeads


