- Jewelry-Making Supplies ▾
Design Jewelry with Confidence!
Seed Beads
Thread, Wire, & Stringing Materials
Findings & Components
Everything Else
- Kits & Collections ▾
Assemble Your World
Kits & Collections
- Subscriptions ▾
Want monthly Beading Happiness?
Subscriptions
- Learn to Make ▾
Want to learn more?
- Discounts & Deals ▾
Explore Today's Promotions!
-
Seed Beads
Thread, Wire, & Stringing Materials
Findings & Components
Everything Else
-
Kits & Collections
-
Subscriptions
- Home
- How to Make Jewelry
- Projects By Bead Type
- Seed Bead 11/0 Projects
- Pandora’s Box Bracelet …
Pandora’s Box Bracelet Tutorial
Step 1: Choose Your Materials
Step 1: Choose Your Materials
-
-
-
-
-
-
-
-
- Claspgarten Infinite Interchangeable Customizable Box Push Clasp for Rivoli 14mm | 3-Strand | Real Platinum Plated (Silver)
-
-
-
Step 2: Watch the
Video Tutorial
Step 2: Watch the
Video Tutorial
Tubelet Bead - Aztec Gold, ~ 40 Pieces
Tubelet Bead - Crystal Labrador Full,~ 40 Pieces
Potomac Crystal Rondelle 1.5x2mm - Blue Zircon AB,~ 60 Beads
Preciosa Chaton SS39 - Blue Zircon AB, ~ 10 Pieces
Miyuki Seed Bead 11/0 - Crystal Labrador Full, ~ 1 Gram
Miyuki Seed Bead 15/0 - Duracoat Galvanized Champagne, ~ 1 Gram
Potomac Crystal Rivoli 10mm - Blue Zircon, 1 Piece
Clasp - Potomax Round Push Clasp (10mm), 1 Piece
Step 3: Need More Help? Follow these Steps
Step 3: Need More Help? Follow these Steps

Quick Project Steps
Quick Project Steps
Creating the Lid: Add a 15/0 seed bead, then alternate between crystal rondelles and Tubelet beads of an alternate color to form the lid of the box.
Securing the Chaton: Place a chaton in the center of the box, using 11/0 seed beads to secure it tightly within the constructed box.
Linking the Boxes: Use the right angle weave technique to link multiple boxes together, creating the bracelet length according to your wrist size.
Adding the Clasp: Finish by attaching the clasp to the ends of the bracelet, ensuring a secure fit.
Step 4: Pick Your Own Colors
Step 4: Pick Your Own Colors
Step 5: Need Any Extra Materials?
Step 5: Need Any Extra Materials?
Step 5: Need Any Extra Materials?
Step 5: Need Any Extra Materials?
Step 6: Choose Your Next Project
Step 6: Choose Your Next Project
Step 6: Choose Your Next Project
Step 6: Choose Your Next Project
- Glasgow Rose Embroidered Pendant - DIY Jewelry Making Tutorial by PotomacBeads
- Glasgow Rose Embroidered Pendant - DIY Jewelry Making Tutorial by PotomacBeads
- Comet Earrings - DIY Jewelry Making Tutorial by PotomacBeads
- Flower Gem Earrings - DIY Jewelry Making Tutorial by PotomacBeads
- Embroidered Rings - DIY Jewelry Making Tutorial by PotomacBeads
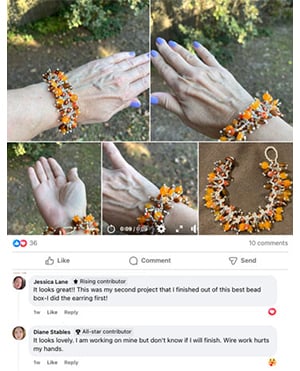
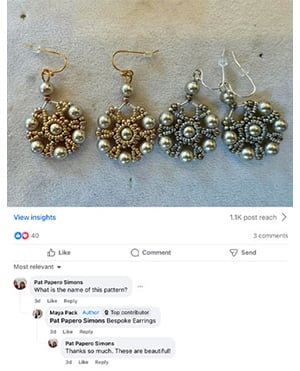
Join Our Growing Community
Join Our Growing Community


Our Testimonials
Our Testimonials
Only Visible on Admin Mode
Item Description
Designer's Material List
Tubelet Bead - Aztec Gold, ~ 40 Pieces
Tubelet Bead - Crystal Labrador Full,~ 40 Pieces
Potomac Crystal Rondelle 1.5x2mm - Blue Zircon AB,~ 60 Beads
Preciosa Chaton SS39 - Blue Zircon AB, ~ 10 Pieces
Miyuki Seed Bead 11/0 - Crystal Labrador Full, ~ 1 Gram
Miyuki Seed Bead 15/0 - Duracoat Galvanized Champagne, ~ 1 Gram
Potomac Crystal Rivoli 10mm - Blue Zircon, 1 Piece
Clasp - Potomax Round Push Clasp (10mm), 1 Piece
Project Steps
Creating the Lid: Add a 15/0 seed bead, then alternate between crystal rondelles and Tubelet beads of an alternate color to form the lid of the box.
Securing the Chaton: Place a chaton in the center of the box, using 11/0 seed beads to secure it tightly within the constructed box.
Linking the Boxes: Use the right angle weave technique to link multiple boxes together, creating the bracelet length according to your wrist size.
Adding the Clasp: Finish by attaching the clasp to the ends of the bracelet, ensuring a secure fit.
Highest Quality
Products
100% Money
Back Guarantee
Fast
Shipping
Best Teaching &
Customer Service
You'll want these emails...
Get Free Projects & Inspiration
Get Free Projects & Inspiration
- Bullet 1
- Bullet 2
- Bullet 3
Copyright © PotomacBeads


-Transparent.png)

