- Jewelry-Making Supplies ▾
Design Jewelry with Confidence!
Seed Beads
Thread, Wire, & Stringing Materials
Athenacast Findings & Components
Everything Else
- Kits & Collections ▾
Assemble Your World
Kits & Collections
- Subscriptions ▾
Want monthly Beading Happiness?
Subscriptions
- Learn to Make ▾
Want to learn more?
- Discounts & Deals ▾
Explore Today's Promotions!
- Jewelry-Making Supplies
- Kits & Collections
- Subscriptions
- Learn to Make
- Discounts & Deals
-
Seed Beads
Thread, Wire, & Stringing Materials
Findings & Components
Everything Else
-
Kits & Collections
-
Subscriptions
- Home
- How to Make Jewelry
- Better Beader Episodes
- Making Travel Earrings
Making Travel Earrings

Materials Used
Materials Used
-
-
-
-
-
-
-
-
-
-
-
- Athenacast Wire Guard Protectors - 4.5x4mm Premium Gunmetal Plated Stainless Steel | Pack of 100
- Athenacast Wire Guard Protectors - 4.5x4mm Premium 24kt Premium 24k Gold Plated Plated Stainless Steel | Pack of 100
-
Watch the Video Tutorial
Watch the Video Tutorial
Need Any Extra Materials?
Need Any Extra Materials?
Need Any Extra Materials?
Need Any Extra Materials?
Episode Transcript
Episode Transcript
Introduction
Traveling with jewelry can be a challenge, but with the right techniques and tools, you can easily take your favorite earrings on the go. In this article, we'll share some tips and tricks from the Better Beader episode 187, "Making Travel Earrings," to help you create versatile, stylish, and travel-friendly earrings.
Materials Needed
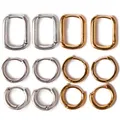
- Huggy earrings with snap-back closure (gold and silver)
- Small organizer or cosmetic case
- Neutral-colored beads (e.g., disco ball beads, moon beads)
- Wire guards
- Laser-cut forms
- Wooden earring forms
- Pearls in various sizes
- Seed beads
- Thread and needle
- Head pins
- Thread burner
- Jump rings or chain
Step-by-Step Tutorial
- Start by packing your Huggy earrings in your organizer. These snap-back earrings are perfect for traveling, as they stay secure and look great on their own.
- Create a neutral, versatile pair of earrings using a disco ball bead or moon bead. Attach the bead to a wire guard using a head pin and a rounded loop. Make sure the loop is large enough to slide onto the Huggy earring.
- For smaller beads or a more eye-catching look, use wire guards to attach them to the Huggies. This keeps the earrings lightweight and easy to wear.
- Experiment with laser-cut forms and markers to create Whimsical, colorful designs that can be worn day or night. Stick to neutral colors for maximum versatility.
- Pack your earrings on wooden earring forms, which are lightweight and help you feel fashionable while traveling.
- Don't forget to include pearls in your travel jewelry collection. Pearls can dress up or down any outfit and add a touch of elegance.
- To create a pearl drop earring, string seed beads and pearls (smallest to largest) on a thread and needle. Add a seed bead at the top, then pass the needle back through to create a swaying effect. Attach the thread to a wire guard, jump ring, or chain to hang from your Huggies.
Customization Ideas & Inspiration
- Mix and match your earrings by stacking smaller designs on your Huggies to create chunkier, more statement-making looks.
- Experiment with different color combinations to match your outfits or personal style.
- Keep a head pin on hand while traveling in case you find a bead or inspiration for a new earring design.
- In a pinch, you can even use hotel room thread and needle to create impromptu earrings.
Conclusion
With these travel earring tips and techniques from Better Beader episode 187, you'll be able to pack efficiently, change up your look, and keep your jewelry secure while on the go. Remember to focus on neutral colors, versatile designs, and the convenience of Huggy earrings. Happy traveling and happy beading!
Join Our Growing Community
Join Our Growing Community


Our Testimonials
Our Testimonials
- 55929 (83.7%)
- 4807 (11.4%)
- 3293 (4.1%)
- 229 (0.4%)
- 124 (0.3%)
- Favorite Reviews
- Highest to Lowest
- Newest to Oldest
- All Ratings
- 5 ★ Reviews
- 4 ★ Reviews
- 3 ★ Reviews
- 2 ★ Reviews
- 1 ★ Reviews
Loading...
Only Visible on Admin Mode
Item Description
Designer's Material List
Project Steps
Create Neutral Designs: Use disco ball beads and wire guards to create simple, light-catching designs.
Add Whimsical Elements: Incorporate fun designs with laser-cut forms and colorful beads for a playful look.
Elegance with Pearls: Design pearl earrings for an elegant touch, using a simple thread and needle technique.
Assemble and Pack: Organize your earrings in a small container, mixing and matching designs to save space and offer variety.
Highest Quality
Products
100% Money
Back Guarantee
Fast
Shipping
Best Teaching &
Customer Service
You'll want these emails...
Get Free Projects & Inspiration
Get Free Projects & Inspiration
- Bullet 1
- Bullet 2
- Bullet 3
Copyright © PotomacBeads


