- Jewelry-Making Supplies ▾
Design Jewelry with Confidence!
Seed Beads
Thread, Wire, & Stringing Materials
Athenacast Findings & Components
Everything Else
- Kits & Collections ▾
Assemble Your World
Kits & Collections
- Subscriptions ▾
Want monthly Beading Happiness?
Subscriptions
- Learn to Make ▾
Want to learn more?
- Discounts & Deals ▾
Explore Today's Promotions!
- Jewelry-Making Supplies
- Kits & Collections
- Subscriptions
- Learn to Make
- Discounts & Deals
-
Seed Beads
Thread, Wire, & Stringing Materials
Findings & Components
Everything Else
-
Kits & Collections
-
Subscriptions
- Home
- _dev
- Bracelet Projects
- Ombre Pearl Bracelet Tutorial
Ombre Pearl Bracelet Tutorial
ONLY VISIBLE ON EDIT MODE *
videos
- Ombre Pearl Bracelet - DIY Jewelry Making Tutorial by PotomacBeads
Learn how to create a stunning Ombre Pearl Bracelet with this DIY jewelry-making tutorial by PotomacBeads. This tutorial guides you step-by-step through the process of creating a beautiful bracelet using 11/0 seed beads, 4mm bicones, 4mm pearls, and a Crystal Labrador full button for the clasp. Perfect for beginners and experienced beaders alike, this project showcases the right angle weave technique with an artistic ombre effect.
Learn how to create a stunning Ombre Pearl Bracelet with this DIY jewelry-making tutorial by PotomacBeads. This tutorial guides you step-by-step through the process of creating a beautiful bracelet using 11/0 seed beads, 4mm bicones, 4mm pearls, and a Crystal Labrador full button for the clasp. Perfect for beginners and experienced beaders alike, this project showcases the right angle weave technique with an artistic ombre effect. Get all the supplies and detailed instructions on our website.
Read More
PPBW2166
Materials Used To make The Project
Materials Used To make The Project
- Potomac Pearls - Blue Colors Collection/Assortment 4mm | 5 Strands | 500 Beads$24.99
- Miyuki Seed Beads - Gilt Lined Opal 11/0$3.69
- Potomac Crystal Bicone Beads - Crystal AB 4mm | Pack of 120$7.99
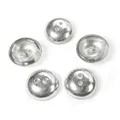
- Cup Buttons - Silver Labrador Full | Pack of 5$4.99
- $4.49
- $4.49
-
Designer's Material List
The designer's suggested colors & materials: Potomac Pearls - Blue Colors Collection/Assortment 4mm, ~ 60 Beads Miyuki Seed Beads - Gilt Lined Opal 11/0, ~ 2 Grams Potomac Crystal Bicone Beads - Crystal AB 4mm, ~ 40 Beads Cup Buttons - Silver Labrador Full, 1 Piece
Quick Project Steps
Prepare Materials: Lay out your beads and thread your needle with Dragon thread.
Add Stop Bead: String a seed bead and leave a 1-2 inch tail.
Start Right Angle Weave:
String one 11/0 seed bead, one 4mm pearl, one 11/0 seed bead, one 4mm bicone, one 11/0 seed bead, one 4mm pearl, one 11/0 seed bead.
Sew back through the first few beads to form a box.
Continue Weaving:
Add beads following the ombre pattern, ensuring the 11/0 seed beads are placed between each main bead.
Continue this pattern until the desired bracelet length is achieved.
Add Clasp:
At the end of the bracelet, string 11/0 seed beads and a Crystal Labrador full button.
Secure the button by sewing back through the beads and tying off the thread.
Finish Bracelet:
Add 26 seed beads on the opposite end to create a loop for the button clasp.
Sew through the beads to reinforce and secure the loop.
Tie Off:
Make a knot between the beads and burn the thread ends close to the beads to finish.
Related Projects
Related Projects
Highest Quality
Products
100% Money
Back Guarantee
Fast
Shipping
Best Teaching &
Customer Service
You'll want these emails...
Get Free Projects & Inspiration
Get Free Projects & Inspiration
Sorry, please correct the following errors:
- Bullet 1
- Bullet 2
- Bullet 3
Thank you for subscribing, can't wait to help you become a better beader!
Copyright © PotomacBeads


