- Jewelry-Making Supplies ▾
Design Jewelry with Confidence!
Seed Beads
Thread, Wire, & Stringing Materials
Findings & Components
Everything Else
- Kits & Collections ▾
Assemble Your World
Kits & Collections
- Subscriptions ▾
Want monthly Beading Happiness?
Subscriptions
- Learn to Make ▾
Want to learn more?
- Discounts & Deals ▾
Explore Today's Promotions!
-
Seed Beads
Thread, Wire, & Stringing Materials
Findings & Components
Everything Else
-
Kits & Collections
-
Subscriptions
- Home
- _dev
- Bracelet Projects
- Minnie Bracelet Tutorial
Minnie Bracelet Tutorial
ONLY VISIBLE ON EDIT MODE *
videos
- Minnie Bracelet (DIY Tutorial)
In this video tutorial from The Potomac Bead Company, Allie teaches you to make the "Minnie" bracelet designed by both her and Anna Tonnesen. You can find a list of materials in the description below.
In this video tutorial from The Potomac Bead Company, Allie teaches you to make the "Minnie" bracelet designed by both her and Anna Tonnesen. You can find a list of materials in the description below.
PPBW1202
Materials Used To make The Project
Materials Used To make The Project
- Toho Demi Round Beads - PermaFinish Starlight 11/0$5.99
- IrisDuo Beads - Aztec Gold 7x4mm | Pack of 50$5.99
- IrisDuo Beads - Jet Bronze 7x4mm | Pack of 50$6.99
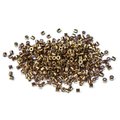
- Miyuki Seed Beads - Metallic Light Bronze 15/0$8.39
- $9.49
- $9.99
-
- Pattern - Minnie Bracelet$6.99
Designer's Material List
The Designer’s suggested colors and materials:
Coco beads (Crystal Red Luster color, approximately 26-30)
Round Duo beads (Zinc Iris color, about 13-15)
Seed beads in various sizes and colors: 15/0 (Silver Lined Root Beer), 11/0 (Vintage Copper), 8/0 (Duracoat Silver Lined Copper)
Toho Demi Round 8/0 beads (as a substitute for one of the seed bead sizes if needed)
Miyuki Twisted Bugles, 6mm
Cut Button (Topaz Light Apricot Full color)
Wildfire beading thread, 0.006, in white
Two beading needles
Optional: Needle nose pliers and thread burner
Quick Project Steps
Gather all materials, including beads, thread, needles, and cut button.
Start by threading your needle and attaching the cut button with a decorative seed bead sequence.
Begin bead weaving by adding Coco and Round Duo beads, following the pattern detailed in the video.
Incorporate various sizes of Miyuki seed beads and the unique Twisted Bugles to add texture and detail.
Continue weaving, following the pattern to extend the bracelet to your desired length.
Finish by creating a loop for the clasp, reinforcing the structure, and adding decorative sides.
Secure and trim the threads to complete your Minnie bracelet.
Related Projects
Related Projects
Highest Quality
Products
100% Money
Back Guarantee
Fast
Shipping
Best Teaching &
Customer Service
You'll want these emails...
Get Free Projects & Inspiration
Get Free Projects & Inspiration
Sorry, please correct the following errors:
- Bullet 1
- Bullet 2
- Bullet 3
Thank you for subscribing, can't wait to help you become a better beader!
Copyright © PotomacBeads


